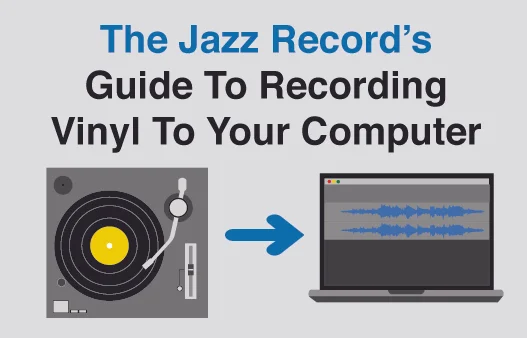
Recording Vinyl To Your Computer
/Getting your vinyl onto your computer can seem a bit complicated at first, but after a few times you'll see it is a pretty simple process. The following method uses an external Audio Interface and the free software Audacity and presumes that you have the most common setup with a turntable running into a stereo receiver, either directly into a Phono input or with a Phono Preamp in between.
Note: The following images of Audacity are from a Macbook Pro. Layout will be different on Windows, but the basic procedures are the same. Also, you can click to enlarge any of the images for more detail.
Step 1: Get yourself a USB Audio Interface. I've been using the Behringer UCA202 Audio Interface for years and it works great. You can get one from Amazon for $30 here. This will allow you to record high quality sound to your computer. You will also need some RCA cables to run from the back of your receiver into the interface, so if you don't have an extra set laying around you should grab some of those from Amazon as well.
Step 2: Go and download Audacity here. It's free, it's awesome and it's all you'll need on the software end to convert your vinyl to digital.
Step 3: Connect the set of RCA cables to the "Record Out" or "Tape Out" input on the back of your receiver (a little trial and error may be required to find the right output depending on how you're receiver is configured). Then connect the other ends of the cables into the "Input" connectors of the Audio Interface. Finally, plug the USB into your computer. If you're using a Phono Preamp you should be able to run the RCA cables from the output of that to the inputs of the Audio Interface.
Step 4: Open Audacity and make sure that the recording input is set to "USB AUDIO CODEC". If it's not, use the drop-down menu to select it (it may be a different name if you're using a different Audio Interface).
Step 5: You're now ready to record. Get your turntable ready to play your vinyl, but just before you drop the needle hit the Record button on Audacity. When the needle hits you'll see the audio waveform rolling across the screen as the new file is being created. When you're finished playing the selection - be it a single track or an entire side of an LP - simply hit the Stop button to end the recording.
Step 6: Now we need to export the sound file. Go to "File" in the menu bar and choose "Export Audio". The first dialog box will have you choose where you'd like to save the exported file and in what format. You are most likely going to choose either "WAV" or "MP3 Files" from the dropdown menu (if you are burning to a CD choose WAV, if you're going to put it on a digital device choose MP3). The next dialog box will have you edit the Metadata for the file (this is the info that iTunes and other music players use to recognize the artist and song of the MP3 file). Click OK and Audacity will export your file.
Step 7: It's time to make some edits. This can be a bit daunting at first, but with some practice and patience you'll have it down in no time. Since you started recording before the album began playing there will be some empty space you want to delete. You will be using the zoom buttons in the top right of the toolbar (the four magnifying glasses) to help get this done.
- Click the furthest right zoom button to view your entire audio file in the window.
- Highlight the first fifteen to twenty seconds of the recording by clicking and dragging your mouse over that area.
- Zoom in on the highlighted section using the first magnifying glass button (the one with the plus sign). You'll want to zoom in about three or four times.
- Press the space bar to begin playback of the highlighted area and make note of where the music starts.
- Once you've determined that spot simply highlight the portion before the music begins and delete it.
- Now follow the same process for the end of the recording.
- Once you're satisfied with your edits, make sure to Save your changes.
Step 8: At this point you want to bring the file up to an optimal volume level. Go to "Effect" and "Amplify" in the menu bar. Audacity will then examine the file and give you a recommended amplification level. Hit OK and than save your changes. The transfer from vinyl to digital is now complete.
Step 9: Load the MP3 or WAV file into iTunes and you now have a digital copy of your vinyl saved to your computer. Burn it to a disc, put it on your iPod, or just stream it off your computer. Now that wasn't so bad was it?
• For CD quality use 41000 Hz and 16-bit sample rates (set in Audacity under Preferences: Quality)
• Under the "Edit" menu is the "Undo" function. This is very helpful while you are making your edits if you happen to delete too much or too little.
• WAV and AIFF files don't offer compression and will be much larger files than MP3 files.
• To add artwork to an MP3 file: select it in iTunes, right click and select Get Info, go to the Artwork tab and import an image.
• If you are recording an entire side of an album, you can use Audacity to split it into individual tracks. Click and drag to highlight each track and then go to "Tracks" in the menu bar and select "Add Label At Selection". Repeat this for each track. When you're ready to export, this time you'll choose "Export Multiple" and then name it and pick the format as above. In this case it will ask you for metadata for each individual track you've created.


